Weekday Easy Dinners, What's Cookin

Vietnamese Meatball Sandwich Recipe (Banh Mi Xiu Mai)

Tired of regular boring sandwiches? I will share with you this Vietnamese meatball sandwich recipe (Banh Mi Xiu Mai). Once you learn how to make it and try it you will soon want to make it again! Here is my super easy to follow and make recipe.

Vietnamese Meatball Sandwich Recipe (Banh Mi Xiu Mai)

Vietnamese Meatball
Sandwich Recipe (Banh Mi Xiu Mai)

IMG_20151012_170814627

What you will need to make the Meatballs:
1 pound ground pork  or ground turkey

1 large egg

3 cloves garlic, minced

½ cup minced green onion

½ tablespoon fish sauce

½ tablespoon soy sauce (This is your salt)

½ tablespoon sugar

1/4 teaspoon whole black pepper

My favorite fish sauce to use…

IMG_20151012_170831977


Sauce:

½ cup water

½ tablespoon sugar

½ tablespoon soy sauce

1 can of diced tomatoes. (Or tomato sauce & dice up 1 large tomato)

1 tablespoons canola or olive oil

1 cloves garlic, minced

1 scallion, chopped

½ teaspoon black pepper

Light sprinkling of garlic powder

Light sprinkling of chicken bouillon


1. Combine all the meatball ingredients in a large bowl and mix well with

your hands. Yes I said it, your hands!

IMG_20151012_171125980

You can not get good meatballs

without some manual labor. Next, use your hands to form meatballs and

set aside on a plate or baking sheet.


IMG_20151012_171833481

2. Heat up a pan with light oil and begin dropping each meatball and

cook each side until brown.

 
IMG_20151012_181304052


3. In a small saucepan over high heat, heat the oil and add 1

tablespoon of finely diced onions and garlic. Cook until browned then;

4. Add the water and diced tomato, and 1 can of tomato sauce . Stir and bring to boil then

add your meatballs to the sauce and let it cook for 5-8 minutes until

sauce thickens.
IMG_20151012_182230440


5. To make a sandwich, cut your French baguette length wise to create

an opening place in an oven and heat until slightly toasted. Optional for

some is to add mayonnaise to the bread I do not put any on mine, but

you can if it thrills ya! Place the meatballs into your bread and spoon

some tomato sauce atop the meatballs to make it nice and juicy! That

is the way I like it! Finish with some pickled carrots and a few sprigs of

cilantro.

Enjoy! It is super messy so grab like 20 napkins!!


DIY Tutorials, Entertaining, Wedding

Sequin Letter Garland DIY

When it comes to throwing parties the more festive the better!In this post I teach you how to make your very own sequin letter garland one of many things I did as I was planning the biggest celebration so far… my own wedding! With that came a lot of planning, expenses and things that need to be pretty-fied! Since I had an ongoing complete home remodel my wedding needed some tender loving care full of a lot of DIY projects to keep cost low without loosing the festive and fun look I was going after. I am a Pinaholic and this DIY comes from a pin I saw originally on Beautiful Mess.

6a00d8358081ff69e201bb07b3d0e2970d-800wi

If you are a bride to be or simply someone who loves to entertain at your home this pretty and easy to do sequin garland will make any room look more festive. You can opt to change the phrase to whatever you would like. I selected the word LOVE as my garland. I plan on using this at my wedding possibly decorating either the dessert table or maybe a table with our pictures. Who knows, but I am sure it will make any basic table look better.

So first of I hit up my favorite craft store. Jo-Ann Fabric and Craft Stores. Make sure to check online for their coupons and simply bring in your phone. I had a 50% all items so I scored and saved a lot! Here is a quick list of what you will need


Supplies:
stretch sequin gold trim (I bought 5 yards. You can use any color of your choice)
-scrap cardboard ( go to the back of a grocery store or any department store to find some ready to be rescued)
X-Acto knife
hot glue gun
– Metallic Gold Trim of your choice.

20141225_172031

First you’ll want to print each letter in your phrase so you can use it as a template. I used Photoshop to be easier than Microsoft Word. Photoshop allows you to easily set the font size. I chose to make my letters 10″ x 4″ in width. My sequin that I bought was 2″ thick so the trim would nicely fit in two layers. Tape each letter to your scrap cardboard and cut out the letters with an X-Acto knife. As your template.


20141225_17205720141225_183236


To make the ends of the trim look as neat as possible, you’ll want to fold and glue the ends under so the trim doesn’t unravel and drop sequins. I learned this by making a mistake on the first letter I made. So, at the end of the outside edge of your letter, use the hot glue gun to glue the trim end face down going away from your letter.

Fold the trim back the opposite way and continue to glue the trim all around the outside edge of the letter. When you reach the other end, cut the trim so it hangs a little past the end, fold the trim under and glue in place.

Very important: Make sure both lines of trim are going in the same direction so they will look more like one piece instead of two.

If you have a letter with intersections, don’t worry about doing the folds on places where you can cover those ends with another row. So on the “V” I just cut and glued the middle horizontal lines, then covered those cut ends with the vertical lines that had folded ends.

Once you have all your letters completed, you can line up your phrase (backwards of course!) and glue your hanging cord to the back of the letters. Once the glue sets, you’re ready to hang your garland!

20141227_14074020141227_134949

sweetlove
Did you try it and make one? Share with us what phrase you made! xoxo- Adriana

Buzz & Bella, Love & Marriage, Wedding

San Diego Engagement Photo Locations

There are hundreds of beautiful locations for San Diego engagement photo locations. Where else in the world can you be surrounded by hundreds of miles of coast line, beautiful country sides, cozy mountains and stunning desert scenery! And all within 45 minutes away from each other! Makes for one killer engagement photo shoot location. We took our engagement photos last summer with Dan Rice Photographey after interviewing and viewing tons of San Diego wedding photographers I ended up going with my very first choice. He was the very first photographer I met at a Bridal Bazaar and happened to shoot in the style I was looking for. Casual. Romantic and Dreamy. At least that is what it looks like to me! So now the challenge was where to shoot.

I read tons of post and yelp reviews of locations to pick the very best location for my shoot. I wanted to do a beach photo shoot and I was also envisioning a beautiful field shoot kind of like this:

fields romantic

So my photographer Dan suggested Marian Bear Memorial Park in La Jolla. At first look I was well….under impressed and thought how the heck is this going to look pretty in pictures.

park Not very pretty huh? Well do not be fooled!

That day my fiancé had forgotten my other outfit changes at home. Let me tell you something: Things will not go perfect! This was my learning lesson and we made the best out of it!

I originally was planning on wearing a very casual look my white Abercrombie & Fitch dress with my favorite brown cowboy boots that my fiancé Mark bought me…but because of our little mishap and I ended up keeping on the gold sequin dress. I bought the dress on Tobi for under $50. I wanted something form fitting to show off and preserve in pictures what I think is a pretty fit body! Lol hey I am going to want to show my kids mom has always been hot!

This is how our engagement pictures turned out:

Nguyen-eng034-2 Nguyen-eng059

Our second San Diego engagement photo location was Del Mar Dog Beach. Mark & I LOVE it here so it was a very special place to us. There is no other beach in San Diego that captures beautiful shoreline and the amazing multi colored cliff formations and where we could bring the two loves of our lives, our Boston Terriers Buzz & Bella. We decided to go to the beach an hour before sunset so we can capture sunlight and the amazing San Diego sunsets. We took our engagement photos in July so the days are long, but make sure to check sunset hour during the time of the year you want to take photos. Also, check the tide…. We didn’t and as you can see by some pictures it was a high tide! The high tide made for a very interested and fun photo shot. We had so much fun shooting here! Our dogs were having a blast and Dan was amazing photographer willing to capture and pretty much do whatever it took to get the shot. I am talking about getting all wet and ruining his shoes! I am telling you he is a great photographer.

Nguyen-eng100 Nguyen-eng164 Nguyen-eng172


Click here to visit our engagement photo shoot gallery.

Some of my other favorite San Diego engagement photo shoot locations include:

  1. Balboa Park – Love it here! I have reserved this location for our wedding day!
  2. Sunset Cliffs Beach – Beautiful secluded beach one of the best places to view the sunset. Cliffs says it all so you need to be daring to climb your way down to reach the beach
  3. Pacific Beach Board walk – great for traditional California beach boardwalk shoots
  4. Belmont Park – Right on the beach. Carnival rides & all!
  5. Gaslamp Quarter – Historic downtown area. Beautiful buildings.

Ask your photographer for more and remember chose what best suits you! Do you have any favorite San Diego photo shoot locations you love? Share with us!  Comment below.


Love & Marriage, Wedding

Our Engagement Photos San Diego

Loved our engagement photo shoot with Dan Rice Photography! Here are some of our favorites!

Nguyen-eng060

http://casadewinn.com

http://casadewinn.com

http://casadewinn.com

http://casadewinn.com

http://casadewinn.com

http://casadewinn.com

Nguyen-eng010


Nguyen-eng012 Nguyen-eng040

Nguyen-eng003

http://casadewinn.com

http://casadewinn.com

http://casadewinn.com


http://casadewinn.com


Del Mar Dog Beach – San Diego, California

http://casadewinn.com

http://casadewinn.com

Nguyen-eng100

http://casadewinn.com


http://casadewinn.com

http://casadewinn.com

http://casadewinn.com

Nguyen-eng172

Nguyen-eng182 Nguyen-eng086 Nguyen-eng189 Nguyen-eng081

Nguyen-eng074

Nguyen-eng075

My Ring

Nguyen-eng164

Nguyen-eng159

Location:Marian Bear Memorial Park La Jolla, CA   and Del Mar Dog Beach.

Hair: Blo Blow Dry Bar 

Photographer: Dan Rice Photography

Makeup – Me, Myself and I 🙂 Laura Mercier silk creme foundation, NARS Orgasm blush, Diorshow mascara, forgot my lipstick color!

Outfit Fields: Gold sequin bodycon dress Tobi

Outfit Beach: Abercrombie & Fitch lace dress.

His Outfit Fields: Distressed Levi bootcut jeans.

His Outfit Beach: Abercrombie & Fitch cargo shorts & tee.

Boston Terriers: Homemade collars.  Bow tie was bought at WalMart kids section.

Food Remodeling, Health & Fitness, Smoothies and Juices

The Difference Between a Cold Press Juicer and a Centrifugal Juicer

Ever wonder what the difference between a cold press juicer and a centrifugal juicer is? Or maybe you didn’t even know there were different type of juicers out there, well there is! Not all juicers are created equal. If you are new to the world of juicing I hope to shed some light and let you know that in the world of juicers, the first thing that you need to know is that juicers fall into two main categories: centrifugal juicers and cold press or also known as masticating juicers. Juicing has become a fashionable and “In” thing to do and with great reason…it is great for you!

Whichever type of juicer you chose to buy the important thing is to use it and juice. Some juicing is better than no juicing, so what is the difference between a cold press juicer and centrifugal juicer?

Centrifugal juicers are more common, and in general, more affordable. They typically have an upright design in which food is pushed into a rapidly spinning mesh chamber with sharp teeth. The teeth shred the food into a pulp, and pulls the juice out of the pulp and through the mesh filter, where it is funneled out of the juicer.  Centrifugal juicers work best with soft and hard fruits and vegetables, but not quite as well with leafy greens like kale or spinach two vegetables I love to juice and are very healthy for you.

ikon

Centrifugal juicers are a great starter juicer as they require very little investment with most good-quality models ranging in price from $100 to $199.

Popular centrifugal juicers include Jack LaLanne’s Power Juicer which was the first juicer I bought and wrote a review on it here.  This one from Breville,  is in my opinion the best centrifugal juicer on the market.


Cold Press/Masticating juicers typically have a horizontal design in which a spiral tube called an auger that lays horizontally.

cold press juicer

The pieces of fruits and vegetables are pushed into the top of the auger, and they are crushed and squeezed by the spiral tube.

Juice drains out of the underside of the tube, while the pulp is squeezed out at the end of the tube.  I like to give my dogs the left over pulp as a treat, they love it!

omegajuicer


Because of the slower crushing and squeezing action, cold press juicers can process leafy greens like spinach and kale. The most important thing in my opinion is that the juice that they produce will last much longer than juice made in a centrifugal juicer, which should be consumed right away as it starts losing nutrients nearly immediately. When I made my fist juice using a cold press juicer I immediately noticed the difference. These juicers produce the type of juice quality in those cold pressed juices selling for like $8 a serving with minimal foam and separation. The difference is very noticeable. Since the juice you can make using a cold press machine is ‘Living Juice’, retaining its nutritional integrity 48-72 hours after extraction, I usually make a juice to use for the next 2 mornings. Cold pressed juicers are tested and proven to extract the highest yield of nutrients and enzymes than any centrifugal juicer in the market.

Cold-Press-vs-Centrifugal-Juicers-1


The quality remains the same and you will notice there is no juice separation. Cold press juicers are pricier than centrifugal models; starting at around $230 for most models. Some of the brands to look for are Champion, Omega, and Green Star. I personally have tried 3 different juicers; the Jack Lalanne, a Breville and now I own this one: An Omega 8006. ( thanks future hubby for the birthday gift! 😉 )

So Which Is Better?

With both juicing machines you are going to be able to extract juice from fruits and vegetables.

When purchasing a juicer it is important to pick one which caters to your lifestyle and needs.

Cold press juicers do have some design elements which require you to be more thorough when preparing to juice. Cold press juicers have a smaller feeding chute than a centrifugal juicer which means you need to be more patient when making the juice as it will take longer. So if you are on the run every morning this may not be the best for you and you may be better off with a centrifugal.

As an estimate in time, if all fruits and vegetables were prepared and ready for juicing:

Cold Press Juicer – Approximately 9-10 minutes

Centrifugal –  5 minutes

Clean Up Time

Cold Press Juicer – 2 minutes

Centrifugal – 7 minutes

Juicing is for the serious. The ones who want to make a difference in their health. Opt for buying fruits and vegetables that are organic unless you will be removing the peel. It really takes discipline to continue to juice and make it a habit. I promise you if you do you will notice a difference in your energy levels, skin clarity and your digestion. I gave up coffee nearly 2 years ago and now only drink it on occassion. My skin used to have many breakouts, but I can say it is pretty clear now. My digestion has improved and  do not have an poo problems! 🙂 And my dogs even enjoy the juice!  Just Juice It!

centrifugal vs cold press juicer

DIY Tutorials

DIY Photo Monogram – My First PINTEREST DIY!

So excited to share with you my DIY Photo Monogram! Like many of you I am addicted to Pinterest and constantly find things I want to make, cook, have, buy,  and do on there! I finally got to work and (got my fiance to work) and was inspired by these photo collages to use it at my upcoming wedding. Not sure yet where it will be displayed, but who doesn’t love pictures! DIY Photo  Monogram

So here is my take on a very simple easy to follow and sure to please anyone Picture Monogram.

I scored these beautiful think hardwood letters at my local Marshalls. I had been scouting their home décor section for a while and finally came acorss an “M” and an “A” for $5.99 each! Once in hand all the other supplies were easy to get.

Supplies:

First thing you will want to do is spray paint the wood letters black. I chose black so that when you cover it up in black and white photos you will be less likely to see the little spaces in between each picture. I like to use Rust-Oleum spray paint. I have found this to work the best.

20150101_145013


Second step – gather all of your material. Lay out all your pictures, your dry letters if you spray painted them and all other things you need.

20141227_142534


Third step – you will want to plan out your picture layout. Treat it like a puzzle. Pick and chose which pictures you want to display and approximately where they will go once you are pretty content with the placement begin cutting using your X-Acto knife and scissors. Add a layer of Mod Podge adhesive to the back of the pictures.

20150101_173526

Forth step – once you have all the pictures cut and glued down where needed you will seal it with the Mod Podge. I chose the gloss finish so that when dry you can have it reflect light better. Let it dry.20150101_182504

That is it! Wah-lah!

DIY Photo  Monogram


You have beautiful personalized monogram letters. Perfect for any display! I can see this being used in a home office, a babies room, at a party, you name it! You can also make numbers say for a babies first birthday! Enjoy. xoxo- Adriana


Love & Marriage, Wedding

How to take timeless engagement photos

How to take timeless engagement photos is something some of us strive for. I mean how many times have you come across an old photo of your parents or an old wedding photo and thought “WTH were you wearing?” I admit I have. I have also come across old photos of them or my grandparents and still look at them and believe they are beautiful. I do not consider myself to be very fashionable. In fact I think I lack a lot of fashion sense and often times I dress for comfort more than I do to be “in” on a fashion trend, but it doesn’t mean I care to look like a slob! I love nice well fitted clothes and well made shoes. So the stress kicked in when I realized I had to plan my engagement pictures and live with them for life! I wanted a look that I can look back 20, 50 years from now and think “wow we looked elegance
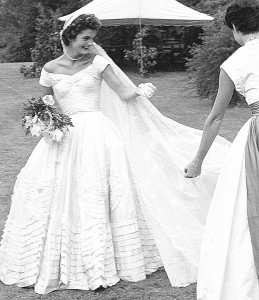
great!” I want to capture the moment of who we are and how we are right now. One of my fashion icons is Jacqueline Kennedy. Look at her wedding day look! Still looks good!

Engagement pictures can go and be done many ways. I have seen many beautiful pictures taken! Some are funny, use props, dramatic, formal, casual, with kids, with pets, you name it! Most importantly you have to do what YOU like and what showcases you and your fiancés personalities and preferences.

Here are some pictures showcasing different styles!


Casual & Symbolic Hometown  

raulmeriann

With Pets

 Nguyen-eng055 

Formal

10734095_10152648260684667_8747005869635229965_n


Cultural 


390899_10150555509908804_1575547850_n


So determine the following for yourself….

  1. What is your style

Are you and your fiancé people who love to snuggle up in sweats and watch football on Sundays? Go on hikes together? Dress up and enjoy a five star dinner? This helps you determine who you are and what style photos to take. Biggest mistake to do is to take photos that are not very representative of you. If your friends and family know you as the couple that love to spend weekends at the park and bbq the it may be weird to take engagement photos in a 3 piece suit at a museum smoking a cigar and drinking champagne….

  1. What to wear

Look good, but look like yourself. I find it very interesting who people take engagement pictures and wear things that they would never wear on any other day or party. Wear what you feel the most sexy and confident in. Look good and do not be afraid of being cheap. These photos will forever be showcased in your home and in your story. Wear something you already own and love maybe a favorite watch or shoes or jersey. Buy a new outfit or rent one on sites like RentTheRunway. Ladies…. Do not cake on the make up! Professional photos are less forgiving on our skin and wrinkles so every little crease is noted and every layer of make up and powder you use is also noticed. Either lay it off or get your make up done professionally using airbrush make up. I got my hair done professionally, but since I have never been one to wear a lot of make up I decided to do it myself and wear my signature red lipstick. You chose what is best for you.

  1. Favorite Places & Things!

For me it was easy. We love our dogs, we love the beach and he loves his hometown of New Orleans! We took our engagement photos at Del Mar dog beach in San Diego with our two Boston Terriers and in New Orleans. We also took a very whimsical dreamy shoot at a park in La Jolla. Click here to check out our full engagement photo session. Our Engagement Photos

xoxo – Adriana


DIY Tutorials, Wedding

Cute DIY Ways To Ask Bridesmaids

I promise I am not turning into bridezilla…but I sure am having fun being a bride to be! Let me share with you two quick and easy DIY ways to ask your girlfriends to be your bridesmaids. Here are two cute DIY ways to ask bridesmaids to be a part of your special day!

Bridesmaidpost

One is your very own Bridesmaid “Pop The Question Diamond Ring” and the other is a “Message In a Bottle”

First,

I scored these super cool paper weights that look like diamonds! Who doesn’t like diamonds!!
$T2eC16FHJGYFFkzNB2n(BSGR08zPIw~~60_35
They already came in a cute little box so all I had to do is write a personal message on each one of them.

BridesmaidProposal


The message in each diamond ring was:

” My turn to POP the question… Will you be my bridesmaid August 8th 2015??


Second I decided to send my cousin who I was asking to be my bridesmaid not just a card and I didn’t just want to pick up the phone and ask her or ask her when I saw her… I got the idea of “message in a bottle” when I spotted these cute glass bottles at Michaels craft store.

20150116_210930


I then used Microsoft Word to type out my message. Mine was this…. I used different fonts.
20150116_210905

Lastly… after picking up some sand from my local beach.. yes people I DID go and pick up some sand from the beach and adding a few gems to it I put it all together and wahlah!

20150117_182735

Real Estate

Kitchen Cabinets – Selecting The Right Wood

Are you working on selecting the right wood for your kitchen cabinets? Maybe you are in the market to remodel or build a new kitchen? Here are some things you should know about kitchen cabinets and selecting the right wood.
kitchen-cabinets-traditional-two-tone-227-s46754140x2-white-dark-wood-hood-luxury-island

Recently I have been visiting a lot of kitchen cabinet makers and learning a lot about the differences between wood that is used to build kitchens that I wanted to share with you guys. I am building a kitchen from scratch… One of many things we are building in the custom built home we are working on. My fiance and I enjoying cooking so designing and building a dream kitchen is very important to us. Cabinets and appliances are also on our top priority. I will share later what I have learned about appliances in a different post) Before we talk about what your cabinets are made from let us first consider whether you should buy stock, semi custom or custom cabinets.

Consider stock cabinets. Whether it’s a big kitchen makeover or a simple update, it’s good to know that cabinets usually come in three types: Stock, semi-custom and custom. Stock cabinets sound exactly like they are: Cabinets that are stocked in-store. These are the most budget-friendly but they don’t offer any customization. They come in standard dimensions of 12″-60″ in width and 30″-36″ in height (overhead cabinets are smaller at 12″-18″ in height). For simple kitchen updates, it’s worth considering getting stock cabinets and then painting or staining them.

Pick semi-custom cabinets over custom. Semi-custom cabinets are the next step up and slightly pricier. They come in a wide range of styles and have to be factory ordered since you can specify the dimensions and type of wood you want. Custom cabinets are the most expensive option because you can have them built specifically for your kitchen in size, material, and style. For bigger rehauls, go with semi-custom for a look that’s specific to your kitchen but won’t break the bank. With semi-custom cabinets you also have the option of getting hardwood door fronts and the drawers have a sturdier dovetail construction.

Custom – Is for the ballers!! Basically your most expensive option. You ask for it, they make it! No size restrictions and they can put all the options money can buy!

Now for wood types:
Alder – This is the cheapest type of wood as it is less dense that others. The weight of an Alder kitchen door vs. all others is significant. If you plan on staying in the home a long time and being serial cooks I would urge against a kitchen made of alder.

Oak- The most durable of them all AMD surprisingly not the most expensive. Oak is great because it is very durable, holds up well against dents and is the least porus.

Maple– Is very durable and holds its color well through time. Maple cabinets you will notice have a more modern look and feel less rustic since the grain in the wood has less knots. Personally one of my favorites.

Cherry- Tends to have a more traditional “redish” tone. And also is prone to fade. So if your kitchen is in an area where it will get a lot of sunlight you should probably look at a different type of wood.
Walnut – a more exotic type of wood. My favorite! I love the color, the grain and the durability of it!

Happy Kitchen redesigning!!

Love & Marriage, My Thoughts, Relationships

Celebrate Valentines Day Everyday

Over priced flowers, heart shape box of chocolates, restaurants jam packed with people sardine style, over paying for a not so excellent food or service, guy rushing to nearest drug store to pick up a card that reads some generic phrase about who much this person loves you and the biggest day for a single man to score with the single ladies who are oh so desperate hitting up the local bar drinking 1 tequila shot to much and although they claim to be so “Anti- Valentines Day” wish up on a star that they had one… Welcome to Valentines Day!!!

Valentines Day can be quite exhausting and yes I know that was the longest run on sentence, but then again I don’t put this blog up to teach you how to write perfect English, It is simply to express some of my ideas and concepts and share so that you may be open enough to share yours. Wouldn’t it be best to celebrate valentines day everyday?

As much as I have dated I can confess that I have never celebrated Valentines Day. Now don’t get me wrong I am no loser who has never received flowers, chocolates, cards, gone on dinners, etc all the traditional stuff people do on this day, I am simply stating that I have never done any of the above on this day. Apparently, this day is intended for you to show your loved ones how much you care and love them. Now I understand why such a holiday would be created because
#1. Gives companies and businesses a reason to make more money.

#2. People are naturally crazy… meaning we get too caught up in our daily routine of work and drama that many of us loose sight of what is truly important in our lives including the people who make it worth while. So we need reminders….

If you are single it can be a pretty intimidating day when your co-workers of friends boast about the things their boyfriends of husbands did for them on Vday while you are sitting back daydreaming about what your ideal Valentine would do for you. I have even heard of women who go as far as to send themselves flowers!! If that is you…. its Ok we all have things we have done that we regret.

But chill out because the single most important thing I have learned about this day is how long does that feeling last? Do not be too impressed by how your friends boyfriends treat them at least do not judge them based on this one day. Ask or observe what is that “BF” or “Husband” like the day, week, or months AFTER Valentines Day.

I have observed way to many “cute” Valentines Day couples succumb to routines and end up loosing appreciation for each other literally hours after this day. I have seen how the fights start up again or how this “loving” boyfriend eyes wander at the sight of another woman the minute his is out of sight or how the neglect starts up again.

I guess this is why I am not the biggest fan of this day. Its as if some of you in relationships believe that this one day, that one card or dinner will make up for all the bulls*&^ you have put your significant other threw. It’s like “cramming” the night before a big exam, knowing you didn’t do what you were supposed to and hope that this 24 hour period somehow erases all that you have neglected the other 364 days of the year or that it can buy you enough credit to last you a few months before you care to show and express your love and appreciation.
And that ladies and gentlemen is why when so much “acting” is going on, it pushes me away from participating in it.

Don’t get me wrong… I accept Valentine day greetings, gifts, and goodies and I appreciate them. What I am asking you to think about is beyond this day. What will you do next Monday to show the people you love, that you love them? That you appreciate them? That you enjoy spending time with them?

When you are in a great relationship I believe it is Valentines Day everyday. That the nice dinners, time spent together, pointless “just because” gifts are truly special and their significance last so much longer. That the person and people you love remain in your thoughts and motivations long after this holiday is over. That their presence remains with you long term.

I have been blessed to be surrounded by loving friends, family and recently an amazing man who fill my life with love 365 days. their energy, love and thoughts about them remain with me 24hours a day. They motivate me to become more, to accomplish more, to appreciate and to love more. If you find yourself single on a day like to day first take inventory on the loving relationships that you do have and secondly do not seek the plush teddy bears, flowers to boast about, but spend time establishing and nurturing the relationships that exist in your life.

Happy Valentines Day To ALL!

To more long lasting beautiful and loving relationships.